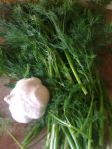
Sea Beans are great, I love their salty crunch. Also called pickleweed, Sea Beans are known scientifically as Salicornia europae variety ruba, and are halophytic (salt loving) plants. When I try to describe how they taste, I always "the Sea". It reminds me of warm days spent by the coast. That's what's so great about foraging, getting to hold onto the time you spend outside, rather than just a memory, you're reminded by foods you bring home. Sea Beans can be found in salt marshes up and down the coast. If you're harvesting them near the city, be careful that it's not from a polluted area, the bay's got more of those than not. Often used as a garnish in restaurants, sea beans can be eaten raw, but they're so salty that a full plate is not that appetizing. I try to find other uses. They are great sauteed with butter and garlic if you're in a hurry, but if you've got time (6 weeks or so), they make a great pickle. Crisp and salty, their thin build lets the picking mix penetrate all the way to the center, totally masking the Sea Bean flavor. Experiment with different concoctions, but my favorite is dill. Great with fish, or in egg salad. Pics are a bit blurry, I guess the iphone isn't perfect.
To make Dilly Sea Beans, you'll need.....
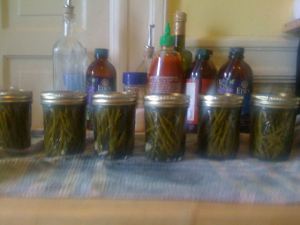
-1/2 pint mason jars (you can use larger ones, but I like standing all the sea beans up in the jar, and this size is perfect for that)
- Garlic (optional)
- Fresh dill
- White vinegar
1. The first step is to sterilize your jars. This isn't a super crucial step since we're using vinegar in the pickling (a soap and water wash is probably fine), but it's a good habit to get into, and becomes more important when making naturally fermented pickles.
-Fill the jars half full with H20. Place in microwave on high for 5-8 minutes, and forget about them for a bit. I'm generally not a fan of the microwave, but if you want to kill things, it's the place to put them(kinda makes you wonder what it's doing to your food). This is a good time to put your lids and rims in some water to boil, they should boil for about 10 minutes (don't put them in the microwave!...unless you want to have a really good story about explosions in the kitchen)
2. Next step is to get your ingredients together. Peel your garlic and....well that's about it, it's super easy. If you want to get a bit OCD, and want your finished product to be a work of food art, the envy of your peers, and a testament to the validity of the dominant power of the human race on our small planet, you can pick out the long sea beans and arrange them in piles according to size and direction, if not, that's cool too.
3. Make a cocktail of 1/2 h2o, 1/2 vinegar (figure out how much you'll need to fill the jars), and boil.
4. Get the jars out of microwave, empty the water.
5. While that heats up, place a sprig (mostly leaves) of dill and optional garlic clove in the bottom of each jar, and then fill with sea beans. I like to stand them all up in one direction, for vanities sake. Then place a sprig of dill on top.
6. Once vinegar boils, fill jars, leaving 1/2inch at the top of each.
7. Place lids on jars, making sure the edges are clean.
8. Now one more boil, place jars in a pot with water to 3/4 height of jar. Boil for 10 minutes.
8. Done! So easy, so delicious. Well, I guess not quite done. After they cool check to make sure the lids don't pop, if they do, the vacuum didn't seal, and they should be put in the fridge to pickle. Place the jars in a cool dark place, and let sit for 4-6 weeks. You can use these in the same way you would cucumber pickles. Sandwiches, egg salad...well I suppose you know how to use pickles. Last thoughts : They're Great! Make them! Also, I'm going to be at the maker faire in the homegrown village, may 29th-31st showing people how to make these, as well as limoncello. Come say hi.